This past few days, I had a sudden urge to do something with the old graphics card I no longer use for gaming. I came across Ollama and realized that self-hosting LLMs has become significantly easier than before. I decided to try it out and document the process. This article covers the deployment and usage of ollama as self-hosted llm platform, as well as two UIs: big-agi and Ollama-webUI (now renamed to OpenWebUI openwebui).
What is Ollama
Ollama can be roughly understood as a framework or platform for running LLMs locally. Once it’s running, it can easily interface with a variety of supported llm models and connect to various UIs. In short, it acts as a multiplexer between LLMs and UIs/applications.
TIP
By the way, this kind of integration work is essentially what “integration” means. Most of these tasks don’t involve much “hard-core” technical expertise. However, they do require speed—quickly connecting to as many upstream and downstream systems as possible to establish a solid foothold. This speed isn’t just about raw speed but also about a deep, precise understanding of the upstream and downstream systems to avoid unnecessary detours and redundant efforts. Unfortunately, this requirement often remains hidden beneath the surface, and many professionals are unaware of it. For those who strive for technical excellence, this is truly tragic.
Since Ollama is just a platform or framework, it naturally requires a UI and LLMs to function. The Ollama GitHub page already lists some options, and I’ve tried a few. Here’s a record of my recent experiments.
Ollama exposes an OpenAI-compatible API on port 11434. A UI designed for ChatGPT can be easily adapted to work with Ollama’s models with minimal modifications.
As for the models supported by Ollama, Meta’s Llama2 is listed. Other models include the recently popular Mixtral 8x7b, Mistral, and Llava2.
Installation (or Deployment)
Ollama provides a ollama command-line tool to manage starting/stopping the service and pulling/deleting models.
The installation is very straightforward. Ollama has a documentation page for install on Linux:
# Download the install script
curl https://ollama.ai/install.sh | sh
# Alternatively, install manually
sudo curl -L https://ollama.ai/download/ollama-linux-amd64 -o /usr/bin/ollama
sudo chmod +x /usr/bin/ollama
# Create a user specifically for running Ollama
sudo useradd -r -s /bin/false -m -d /usr/share/ollama ollama After this, it’s best to set Ollama as a service to start automatically. This is handled by systemd.
Create a systemd service config at /etc/systemd/system/ollama.service:
[Unit]
Description=Ollama Service
After=network-online.target

[Service]
ExecStart=/usr/bin/ollama serve
User=ollama
Group=ollama
Restart=always
RestartSec=3

[Install]
WantedBy=default.target
Reload the service config and enable Ollama:
sudo systemctl daemon-reload
sudo systemctl enable ollama
However, by default, Ollama only accepts requests from 172.0.0.1. If you, like me, want to run the UI on another host, this is not sufficient. To allow access from all IPs, set an environment variable:
OLLAMA_HOST=0.0.0.0
To pass this environment variable to Systemd, add the following line under [Service] in the service config:
Environment="OLLAMA_HOST=0.0.0.0"
Alternatively, create a new file /etc/systemd/system/ollama.service.d/environment.conf with:
[Service]
Environment="OLLAMA_HOST=0.0.0.0"
After this, restart the service to ensure the changes take effect:
sudo systemctl daemon-reload
sudo systemctl enable ollama
Once everything is set up, you can start using Ollama:
ollama pull llama2
ollama run llama2
This opens a command-line UI for interacting with the model. However, this interface is not very modern, making it inconvenient to set system prompts or adjust parameters like Temperature. These settings are better handled through a UI.
Setting Up the UI
So far, I’ve tested two UIs: Big-AGI and Ollama WebUI.
Big-AGI
Big-AGI (#big-agi), as its name suggests, has ambitious goals. ollama is just one of the many backends it supports. The idea is to consolidate various AI backends into a single platform, enabling users to accomplish any AI-related task through Big-AGI.
A minor drawback of Big-AGI is the lack of built-in authentication. This might not be a problem for individual users, as you can set up a simple access list via a reverse proxy.
Big-AGI previously lacked a reliable Docker image (but it has been updated recently). Instead of struggling with Dockerfiles, I installed it directly on LXC. However, Big-AGI requires NPM.
Installing nodejs via apt install on ubuntu is not ideal. If you’ve already used apt install npm, the following steps can undo the changes:
sudo rm -rf /usr/local/bin/npm /usr/local/share/man/man1/node* ~/.npm
sudo rm -rf /usr/local/lib/node*
sudo rm -rf /usr/local/bin/node*
sudo rm -rf /usr/local/include/node*
sudo apt-get purge nodejs npm
sudo apt autoremove
Installing the latest version of NodeJS is straightforward. First, download the latest tar.xz file from https://nodejs.org/en/download/ :
tar -xf node-v#.#.#-linux-x64.tar.xz
sudo mv node-v#.#.#-linux-x64/bin/* /usr/local/bin/
sudo mv node-v#.#.#-linux-x64/lib/node_modules/ /usr/local/lib/
# Replace #.#.# with the version you downloaded.
# Verify installation:
node -v
npm -v
Once NodeJS is installed, the rest is simple. Follow the documentation:
git clone https://github.com/enricoros/big-agi.git
cd big-agi
npm install
npm run build
next start --port 3000
Docker Compose
Big-AGI recently updated its Docker image. It can also work with Browserless to enable LLMs to read content from specific URLs.
version: '3.9'
services:
  big-agi:
    image: ghcr.io/enricoros/big-agi:latest
    ports:
      - "3000:3000"
    env_file:
      - .env
    environment:
      - PUPPETEER_WSS_ENDPOINT=ws://browserless:3000
    command: [ "next", "start", "-p", "3000" ]
    depends_on:
      - browserless
  browserless:
    image: browserless/chrome:latest
    ports:
      - "9222:3000"
    environment:
      - MAX_CONCURRENT_SESSIONS=10
Overall, the docker-compose setup is clean and efficient.
Connecting Big-AGI with Ollama
A single image explains everything:
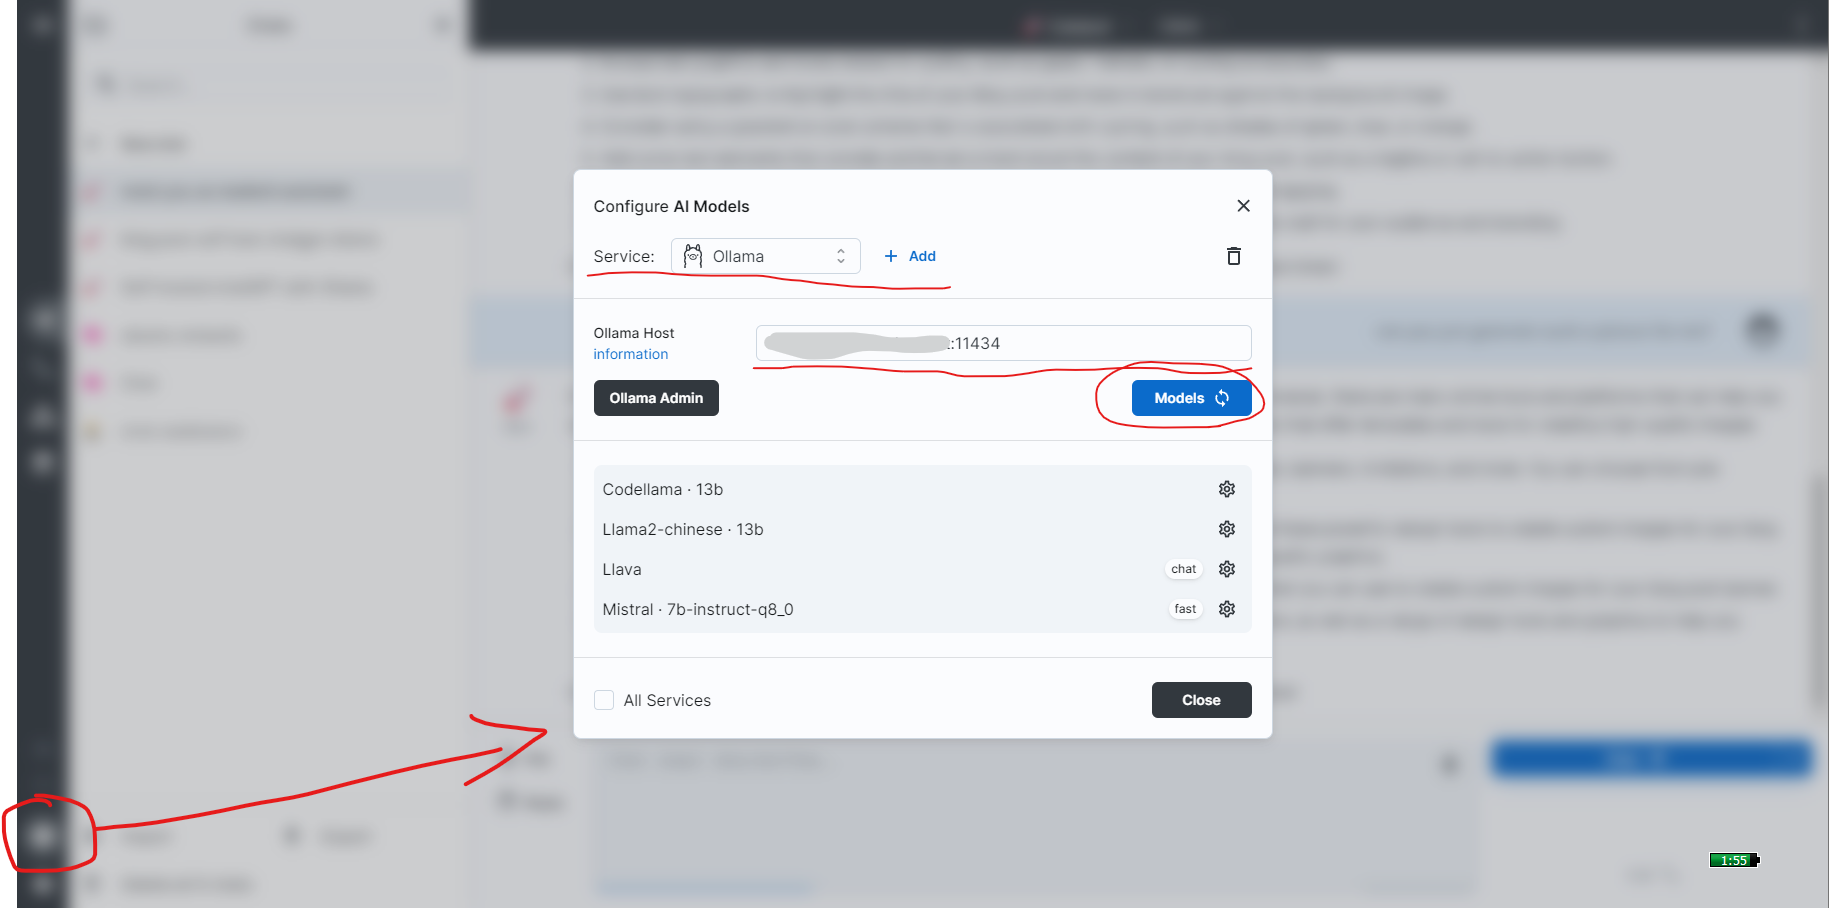
Of course, the official documentation also covers this.
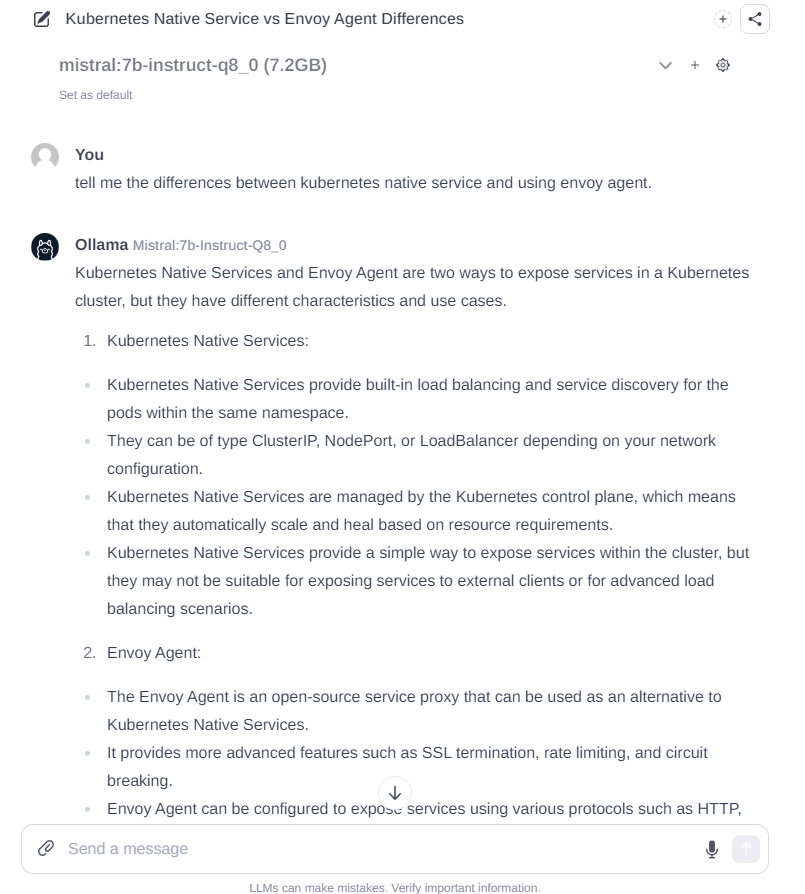
Using Big-AGI
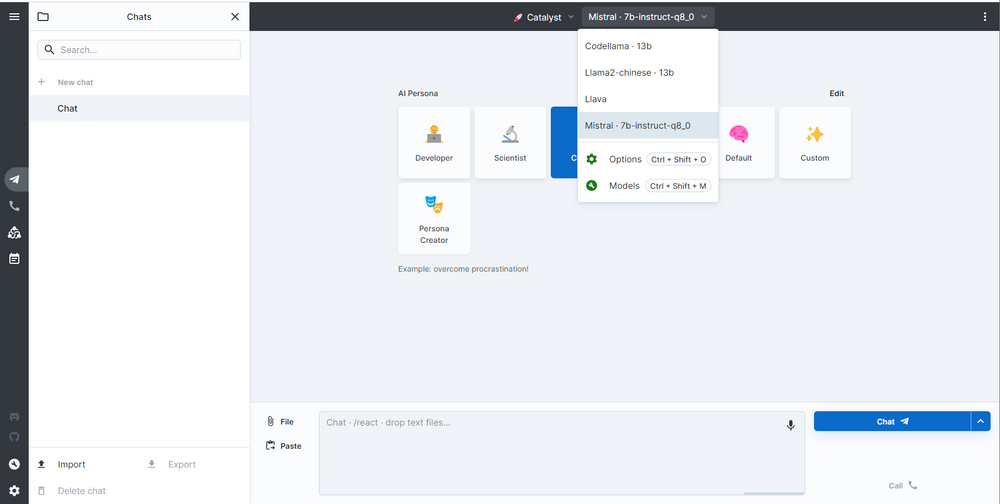
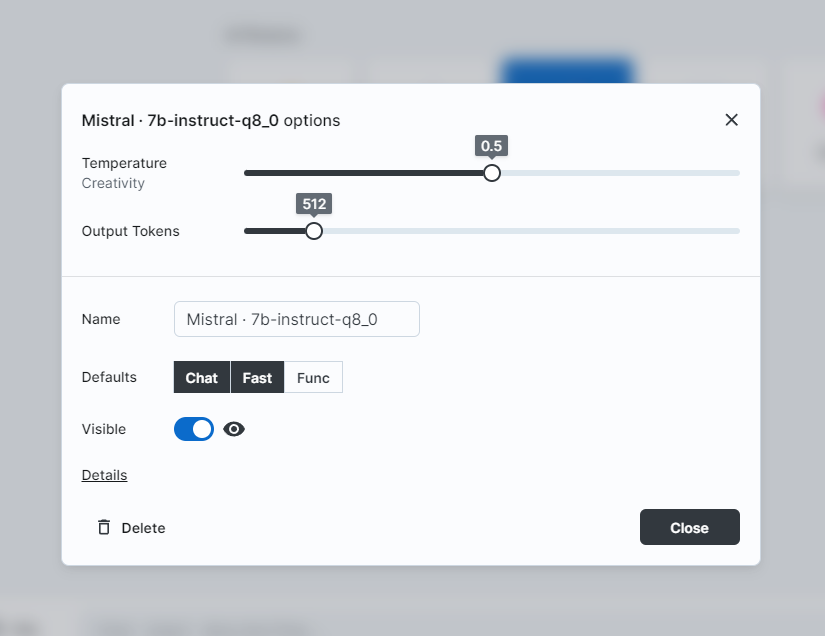
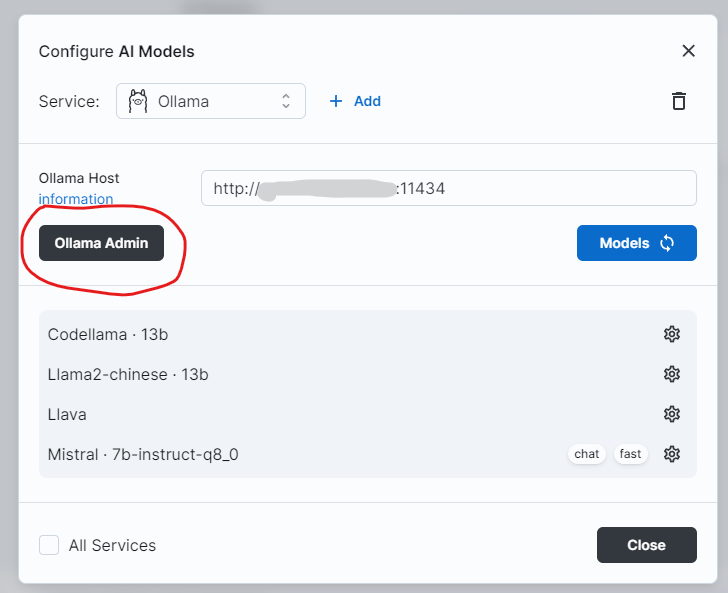
Once everything is ready, select a model already pulled by Ollama in the UI. You can adjust parameters like the number of tokens and Temperature:
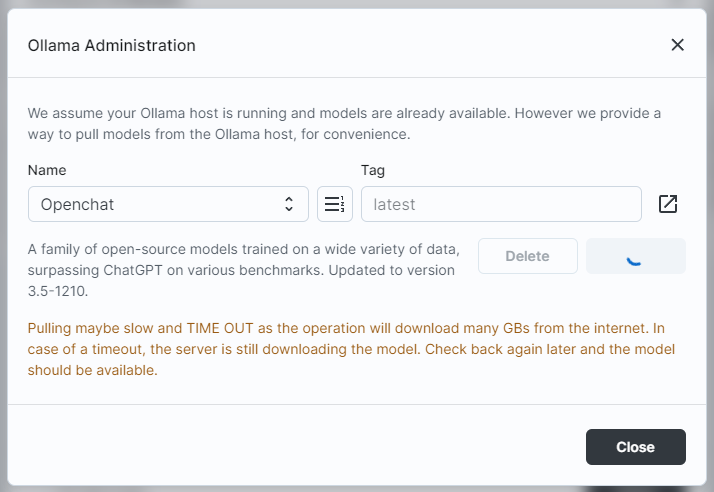
Big-AGI can also use the Ollama Admin Panel to directly pull new models from the internet:
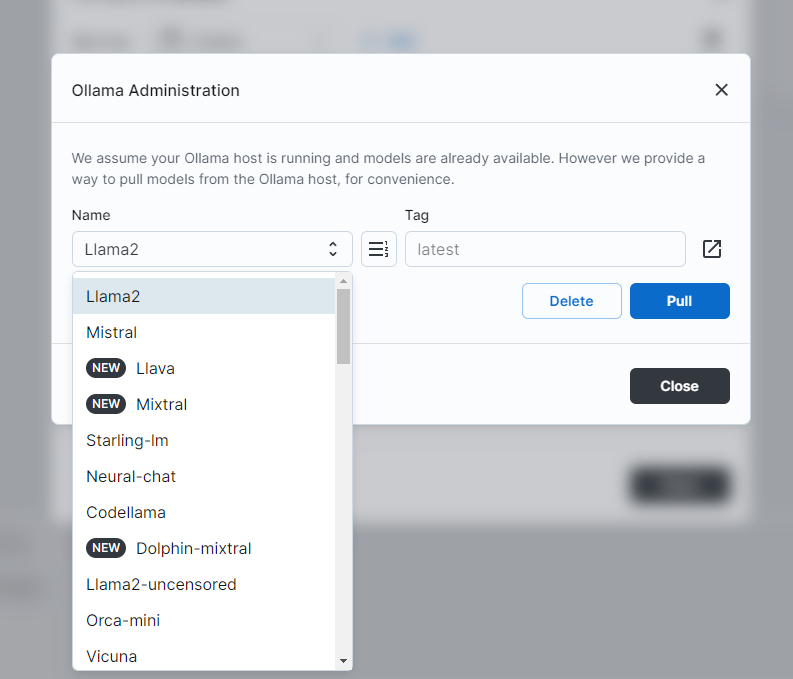
In a way, this is more convenient than Ollama’s command-line UI. However, pulling models (which can be several GBs or more) takes time, and the UI may time out.
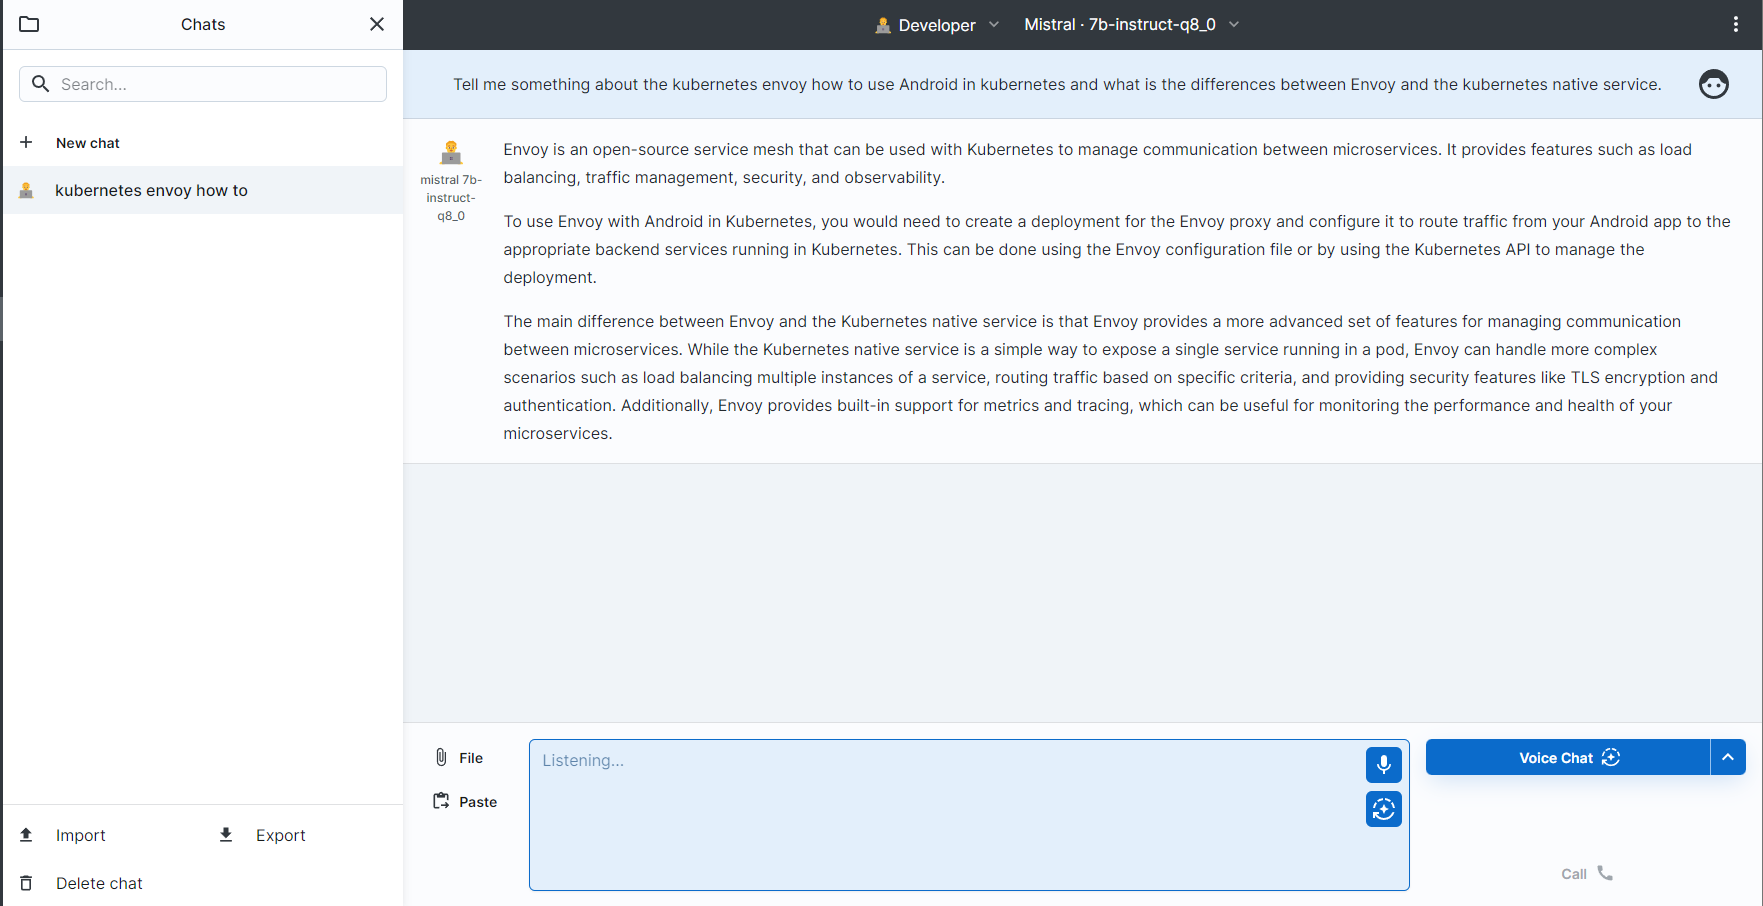
A unique feature of Big-AGI is its pre-defined AI personas, which eliminate the need for manual system prompt setup. Users can quickly get the content they want. For example, the Developer Persona is better at code, with fewer hallucinations. The Catalyst persona is better for writing blogs, but may have more hallucinations. The Executive persona is suitable for reports, with a more professional manner.
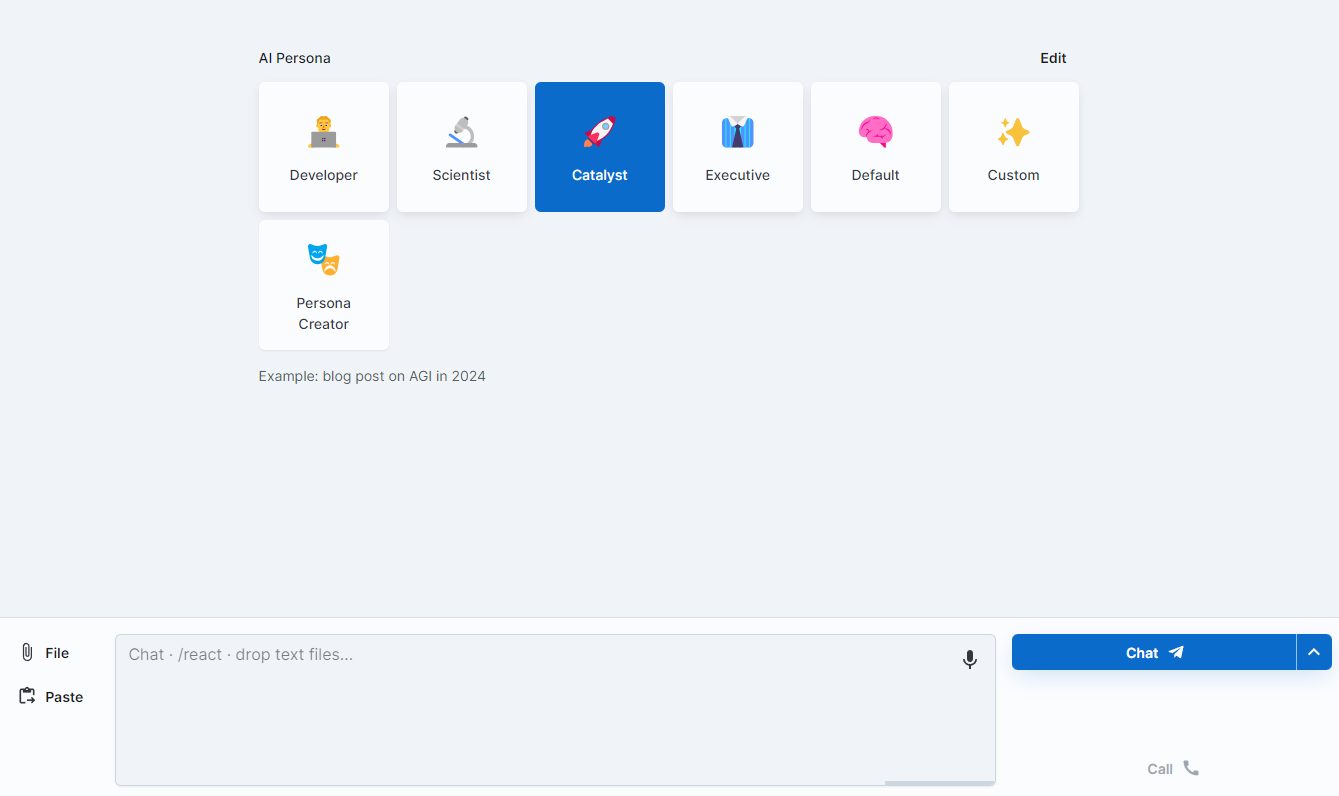
You can then chat with the AI. Big-AGI also supports voice input, converting speech to text and sending it to the LLM. This enables a near-human interaction experience.

Big-AGI has many more features to explore, which I’ll cover in future posts.
Ollama WebUI
Unlike Big-AGI, Ollama WebUI (now openwebui) is designed specifically for Ollama. Its interface is similar to ChatGPT’s. Compared to Big-AGI, this interface is more familiar. Ollama WebUI also includes authentication.
TIP
Ollama WebUI has been renamed to OpeWeb UI. Now it aims to be a general-purpose WebUI for all LLMs backends. Also, the feature set of Ollama WebUI/OpenWeb UI has been expanded significantly in the last several months.
Since Ollama WebUI is tailored for Ollama, integration is straightforward. The connection is done via the environment variable OLLAMA_API_BASE_URL. Here’s the docker-compose:
version: '3.8'
services:
ollama-webui:
image: ghcr.io/ollama-webui/ollama-webui:main
container_name: ollama-webui
volumes:
- <path_for_ollama_data_on_your_host>:/app/backend/data
ports:
- 3000:8080
environment:
- 'OLLAMA_API_BASE_URL=http://<you_ollama_IP/hostname>:11434/api'
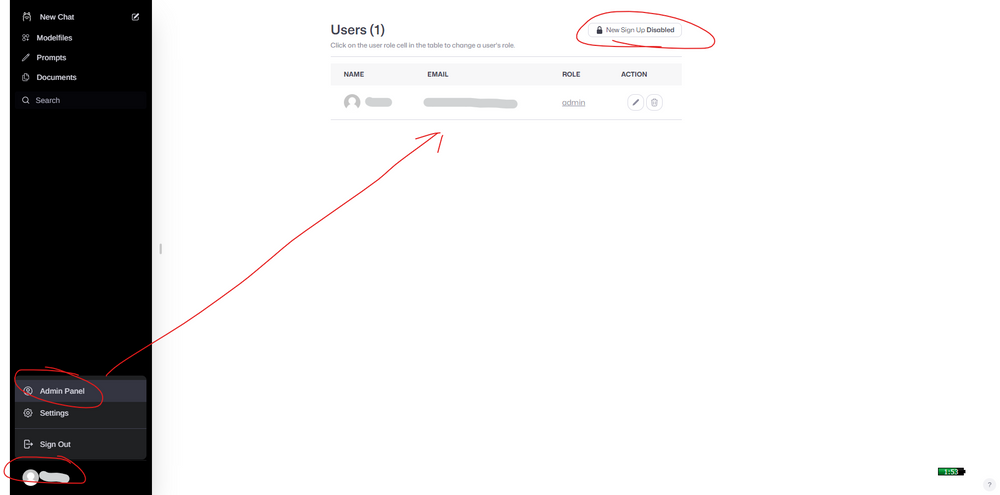
restart: unless-stopped On the first login, you can register a user. The first registered user becomes the admin.
If you’re an individual user, remember to disable new user registration to improve security.
Using Ollama WebUI
First, select a model.
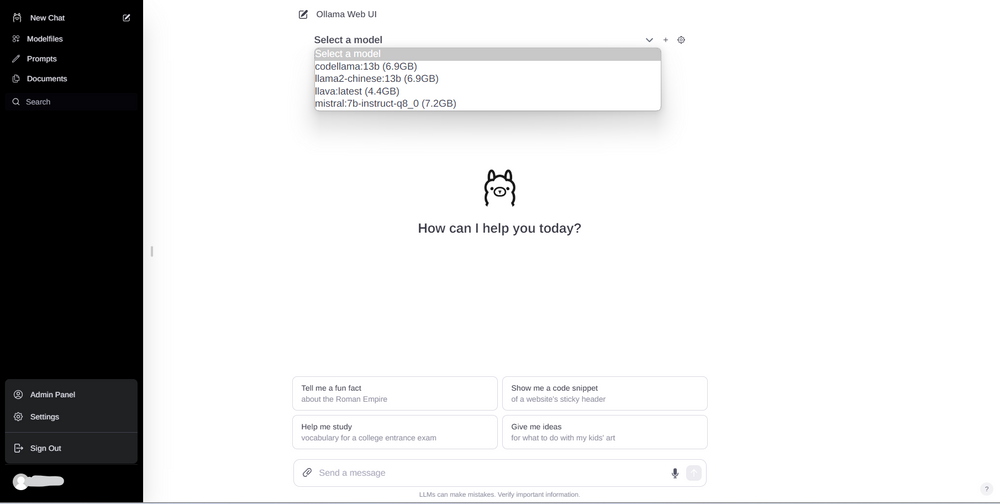
If the desired model isn’t available, you can pull it directly via the UI.
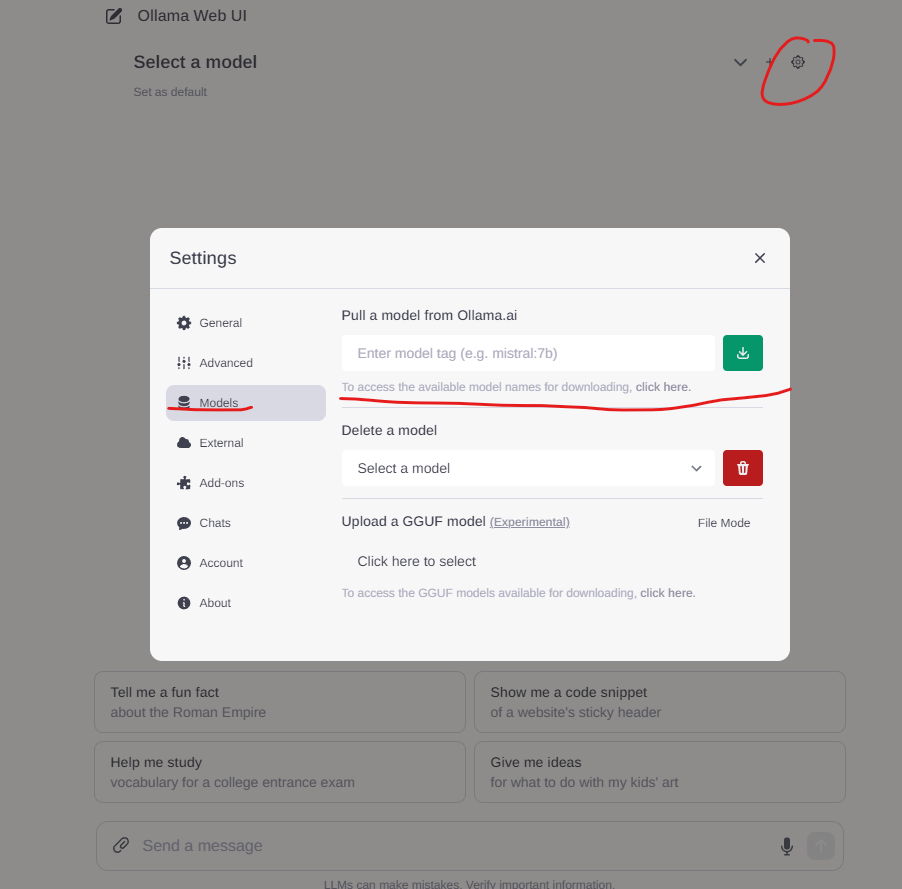
Unfortunately, there’s no dropdown list here. You’ll need to find the model name and tag from this link
Ollama-WebUI also supports voice input. However, it’s slightly less sensitive than Big-AGI and lacks an auto-continue option. For most everyday uses, it’s sufficient.